1. Click the Start button
 and then click Control Panel.
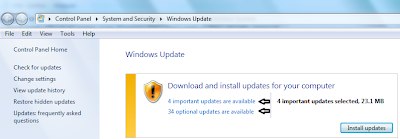
2. If the View by: is Category then click on System and Security and then click Windows Update. If the View by: is Large icons or Small icons then click on Windows Update.
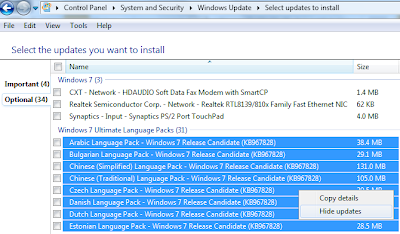
3. Click on the Important updates link or the Optional updates link to hide the update. The following figure shows this.
 4. To hide a single update, right-click on an update and click Hide update. You can also hide multiple updates at once.
 - You can either make a continuos selection by clicking the first update, having the Shift key in pressed state, and then clicking the last update. Once the updates are highlighted, right-click on any update and click Hide updates.
- You can also make a non-continuos selection by clicking the first update, holding the Ctrl key and clicking the updates that needs to be hidden. Once the selection is done, right-click on any update and click Hide updates.
 5. Click OK.
 You will see the name for the recycle bin as Recycle Bin in Windows 7. If you need to change the name to Trash Can or to a name of your need, you can do it easily. Perform the following to rename the Recycle Bin.
 3. Click Manage another account (If you are prompted for an administrator password or confirmation, type the password or provide confirmation).
 or
or  and then click Internet Options.